Den här artikeln finns även på:
![]() Svenska
Svenska
You can create a new server via Oderland Cloud in two different ways. Firstly, you can create the server via the Client Area on our website, or you can use the Oderland Cloud control panel. Below we describe both approaches.
Create a server via the Client Area
To create a server via the Client Area, do the following:
- Begin by logging on to the Client Area.
- Click
CloudunderServicesin the menu to the left.
- Then, click
+ Create New Server.
- The page you land on now lets you choose the operating system, system resources, disk space, IP address and so on for your new server. You can always see an estimate of what the server will cost per month at the bottom of the page.

- When you are satisfied with your choices, click
+ Create Serverat the bottom.
Create a server via the Oderland Cloud control panel
To create a server via the control panel for Oderland Cloud, do the following:
- Begin by logging on to the Oderland Cloud control panel.
- When you’ve logged in, go to
Compute(the cube-like icon) ->Virtual machinesin the menu to the left.
- Click on the
+ Create virtual machinebutton. This will either be visible in the centre of the page (if you don’t have any servers set up already) or in the top right corner above the list of existing servers. The image below shows what it looks like if there are no servers already set up.
- You will now see the settings for creating the server. Below we go through the steps.

- Start by entering a name for the server under
Name. This is used to distinguish and identify the servers within your Oderland Cloud account.
- Now you need to select the operating system for the server, which is done via selection of the image the server is based on when it is created. On the
Imagerow, clickSpecify.
You are now presented with the list of available images and can select the operating system. There are a large number to choose from and you choose what you want and need.
Click on the image you want to use and then theDonebutton. - The next step is to set up at least one disk for the server. This is done through
Volumes. When you select an image as described above, a disk/volume will be added automatically but you may want to resize it according to your needs. To resize the proposed disk, click on the pencil on the right side of the row for the disk.
Then click the...button to the right of the disk and then clickEdit. Here you can now resize the disk by the field
 Size. Once changed, click theSavebutton to save the modification.
Finally, clickDoneto continue the server setup. - Now it’s time to choose how many CPU cores and how much RAM the server will have. This is controlled via Flavor. Therefore, click
Specifyon the line forFlavor.
You will now be presented with a number of flavors to choose from to get your server up and running. Click on the row that best matches your needs and then theDonebutton.
- Next, networking should be set up on the server, which is done via
Network interfaces. So clickSpecifyon the row for this.
Click theAddbutton to add an IP address to the server.
Click onNetwork - Selectand then on the network you want to use.
Make sureAssign automaticallyis ticked on both IPv4 and IPv6 and clickAddat the bottom. Then click the
 Donebutton at the bottom. - To be able to access the server after it is created, you need to add one or more SSH keys. You do this via the
Specifybutton on theSSH keyrow.
Here you can select an SSH key that you have already added to Oderland Cloud or add a new one directly via theAddbutton.
ClickDoneafter selecting the SSH key.
- Optional: If you want, you can add customised scripts that run when the server is created, so-called cloud-init scripts. You do this via
Specifyon theCustomization scriptrow.
This is intended for advanced users and examples of what can be done via cloud-init can be found in the official documentation. - Optional: If you want to enable hot plug support on the server (i.e. upgrading and downgrading CPU/RAM during operation), you can select this under
Advanced options->Enable CPU and RAM hot plug. Please note that you need to configure your server correctly to be able to use this feature without experiencing kernel panic and similar negative consequences.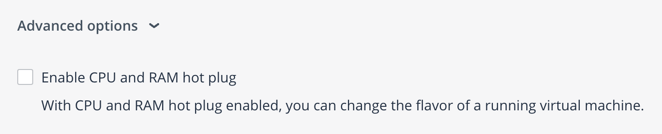
- When you are done with all the choices for setting up the server, click the
Deploybutton at the bottom to create the server.
As soon as the server is created, you can see it become active in the list of servers in your Oderland Cloud account.